
When customizing your motorcycle, painting the fairings is a great way to give it a unique look. Whether you want to change the color or repair damage, this article will guide you through painting your motorcycle fairings. From choosing the right paint to finishing up, we’ve got you cover
Prepping the surface
When painting your motorcycle fairings, preparing the surface is crucial to ensure a smooth and long-lasting finish.
Start by thoroughly cleaning the fairings with soap and water, removing dirt, grime, or grease.
Next, use a sandpaper or sanding block to lightly sand the surface, creating a rough texture to help the paint adhere better.
Fill any dents or scratches with a suitable filler and sand until smooth.
Lastly, wipe the fairings down with a degreaser to remove any remaining residue and allow them to dry completely before moving on to the painting process.
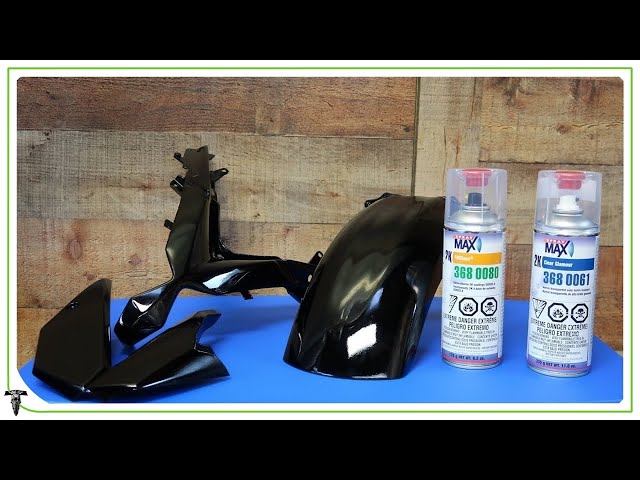
Painting the fairing
Once you have prepped the surface of your motorcycle fairings, it’s time to start painting. Here’s a step-by-step guide to help you achieve a professional-looking finish:
- Choose the paint: Select a high-quality automotive paint compatible with your fairing material. Make sure to choose a color that you love, and that matches your bike’s overall aesthetic. You can opt for a solid color or get creative with custom designs.
- Prepare the paint: Follow the manufacturer’s instructions to mix the paint and any required additives or hardeners. Use a clean container and stir gently to avoid introducing air bubbles into the mixture.
- Apply the primer: Start by applying a thin and even coat of primer to the fairing. The primer will help the paint adhere better and improve the overall finish. Allow the primer to dry completely before moving on to the next step.
- Apply the base coat: Using a spray gun or aerosol can apply several light coats of the base color paint. Allow each coat to dry before applying the next one. I will help achieve a smooth and even finish.
- Add custom designs: Now is the time to add any custom designs or decals. Use stencils or freehand techniques to create unique patterns or logos on the fairing. Allow the designs to dry completely before proceeding.
- Apply the clear coat: Finish off the painting process by applying a clear coat to protect the paint and give it a glossy finish. Apply multiple thin coats, allowing each coat to dry before adding the next one.
- Allow for proper curing: Once you have finished painting, it’s crucial to let the fairing cure for the recommended amount of time. I will ensure that the paint fully hardens and becomes durable.
Finishing Up
After the final coat of paint has dried, you can apply a clear coat to protect the paint and give it a glossy finish. It will also help to enhance the durability of the paint.
Finally, reassemble the fairings onto your motorcycle, securing them properly. Take a step back and admire your newly painted fairings!
Conclusion
Painting your motorcycle fairings is a rewarding project that allows you to personalize your bike. Following the steps outlined in this article, you can achieve a professional-looking paint job that will make your motorcycle stand out.
When painting your motorcycle fairings, remember to work in a well-ventilated area and wear proper safety gear, such as respirators and gloves. Following these steps and taking your time will help you achieve a stunning and long-lasting paint job that will transform the look of your bike.